Ice Dyeing

This was my second attempt at snow/ice dyeing. During my first attempt, I used snow (the last snow of the year (in April!)) and waaaay too much dye. The fabric dyed, but the results weren’t terribly interesting. At least, not any more interesting than if I’d tub dyed it. I was hoping for more novel textures I couldn’t get from just scrunching the fabric.

In this try, I used ice from a bag. I used commercially printed yellow fabric which I soaked in water and wrung out. I laid it out with random folds on top of a cooling rack (who could have predicted I would choose dyeing fabric over cooling cookies?) which I put over a dishpan.

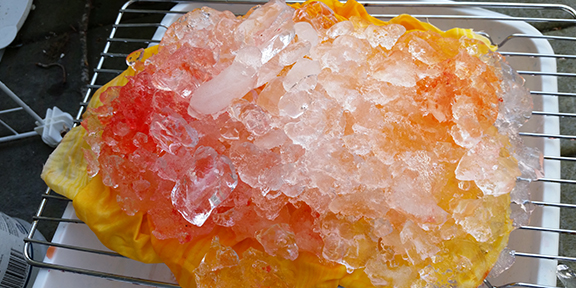
The first time I snow dyed, the fabric sat in the melted snow + dye mix, so I ended up with very few undyed areas. I thought elevating it over a pan might make the results more interesting.

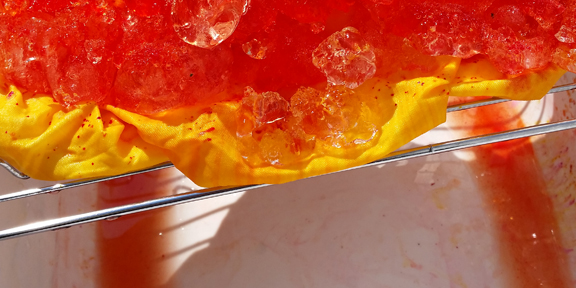
I sprinkled the dye over the top of the ice. I was feeling impatient, so I put it in the sun to melt faster. I let it melt all the way down and then rinsed it out and laid it out over the banister to dry in the sun.

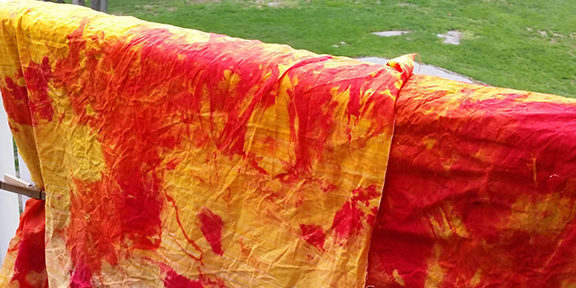
This picture (above) is way over saturated; it was bright, but not quite that bright.

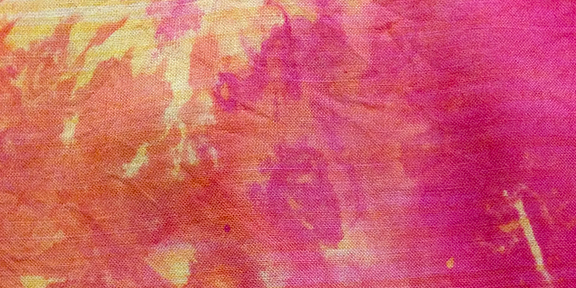
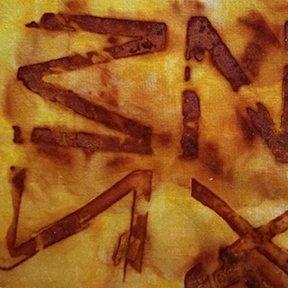
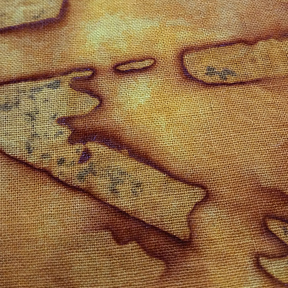
These photos are after it was dry and ironed. There are some interesting textures, some color mixing, but I don’t think the dye I used was the best choice. There was no color separation, which was probably the dye.

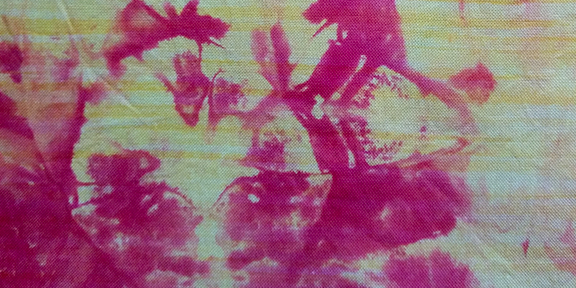
Speckles are always interesting. And I like the mirror images that folds create, but I was hoping for more ice cube textures. I think I can just make out a few in the image below.

It’s a fun process, but I don’t think I’ve found anything exceptional about it. I feel like I could get these textures by tub dyeing. I think I need to experiment more.

Next time:

☆ use less dye

☆ don’t rush the melt

☆ combine with some kind of resist?

Rust Dyeing

I have had plans for a while to make a quilt about my chronic anemia. Since it’s all about iron deficiency, it only makes sense to involve some iron in the making of the quilt itself. That means rust dyeing! Yay!

I had previously done some rust dyeing with washers and loved the way the dyed fabric looked. Sort of like red blood cells…or close enough to represent them, anyway.


I found some rusty metal letters online. I had no idea how many people sold rusty things online until I started looking for metal to rust myself for dyeing. I bought the whole alphabet plus some numbers and a few extra interesting shapes.


I soaked my fabric in vinegar, laid out the washers and the letters and then covered it with another layer of fabric. I made sure the top fabric made good contact with the metal. I love the subtle look of the metal showing through the wet fabric.


I also layered some printed fabrics (in a frisbee because I am a professional artist and use only the best, most professional equipment) with the letters and shapes I had left over.

It was a sunny day, so I put the tray and the frisbee in plastic bags and put them out on the porch in the sun. The iron was already oxidizing within a half hour. I left them for 5 hours and then opened them up to see how they looked.

So, how did they look? Dreamy!

Look at that delicious texture. And the printed silver still shows through the dye. I wasn’t very careful about the way I laid the fabric over the metal, so I ended up with some interesting folds and mirror images.

For the fabric I dyed specifically for the quilt, I put a piece of fabric under the metal and then on top, like a sandwich. The top piece of fabric got more air than the bottom, so the metal oxidized more (left image, below). It’s much darker, with less definition and texture. The fabric that was on the bottom (right image, below) has such great texture, but there were places where the metal didn’t affect the fabric at all, so some of the letters aren’t readable. I like both.


Below are the yellow printed fabrics I used. The left image was the top layer and the right was the layer on the bottom. So pretty!


I have one more piece of fabric to dye to finish the words I want to use in the quilt, and then I will figure out where I’m going with this whole thing. So much fun experimenting!